On this page
Deploying Deno to Cloudflare Workers
Cloudflare Workers allows you to run JavaScript on Cloudflare's edge network.
This is a short How To guide on deploying a Deno function to Cloudflare Workers.
Note: You would only be able to deploy Module Workers instead of web servers or apps.
Setup denoflare Jump to heading
In order to deploy Deno to Cloudflare, we'll use this community created CLI
denoflare.
deno install --unstable --allow-read --allow-net --allow-env --allow-run --name denoflare --force \
https://raw.githubusercontent.com/skymethod/denoflare/v0.5.11/cli/cli.ts
Create your function Jump to heading
In a new directory, let's create a main.ts file, which will contain our Module
Worker function:
export default {
  fetch(request: Request): Response {
    return new Response("Hello, world!");
  },
};
At the very minimum, a Module Worker function must export default an object
that exposes a fetch function, which returns a Response object.
You can test this locally by running:
denoflare serve main.ts
If you go to localhost:8080 in your browser, you'll see the response will say:
Hello, world!
Configure .denoflare Jump to heading
The next step is to create a .denoflare config file. In it, let's add:
{
  "$schema": "https://raw.githubusercontent.com/skymethod/denoflare/v0.5.11/common/config.schema.json",
  "scripts": {
    "main": {
      "path": "/absolute/path/to/main.ts",
      "localPort": 8000
    }
  },
  "profiles": {
    "myprofile": {
      "accountId": "abcxxxxxxxxxxxxxxxxxxxxxxxxxxxxxx",
      "apiToken": "abcxxxxxxxxx_-yyyyyyyyyyyy-11-dddddddd"
    }
  }
}
You can find your accountId by going to your
Cloudflare dashboard, clicking "Workers", and
finding "Account ID" on the right side.
You can generate an apiToken from your
Cloudflare API Tokens settings.
When you create an API token, be sure to use the template "Edit Cloudflare
Workers".
After you add both to your .denoflare config, let's try pushing it to
Cloudflare:
denoflare push main
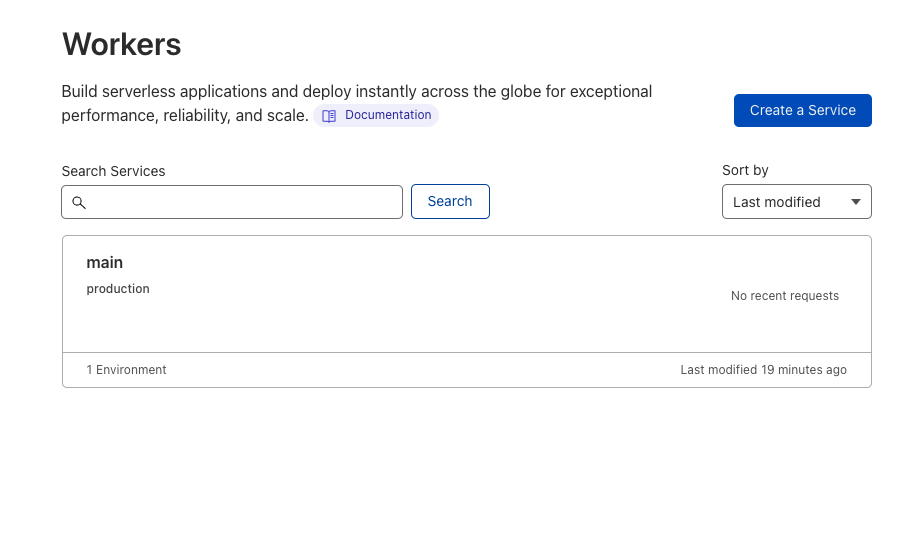
Next, you can view your new function in your Cloudflare account:

Boom!